- Requires Token2Shell version 15.1.0 or higher
- Windows 10 April 2018 Update (1803) and
Ubuntu 18.04 were used while preparing this post
Windows Subsystem for Linux (WSL) currently has very limited support for USB devices; it only supports accessing storage and serial pass-through devices. So you cannot directly use your YubiKey for SSH public key authentication in WSL; it doesn't matter which Linux distribution you use, they all have this limitation.
However, since Token2Shell natively supports PIV smart cards such as YubiKey and SSH agent forwarding, you can use your YubiKey from WSL via Token2Shell. The following describes the steps to accomplish this.
STEP 1 Install OpenSSH on WSL
We'll be using Ubuntu 18.04 and an OpenSSH server for setting up our workflow. If you're using a different Linux distribution, please consult its manual for installing and configuring an SSH server. You don't have to use an OpenSSH server; if you prefer a different sever, just make sure it's properly supported in WSL with the "publickey" user authentication and SSH agent forwarding.
For more information about installing an OpenSSH server on Ubuntu 18.04, please visit:
https://token2shell.com/howto/using-wsl-from-token2shell-or-any-terminal-emulator-via-openssh-server
STEP 2 Enable SSH Agent Forwarding in Token2Shell
SSH agent forwarding allows you to use locally stored private keys for user authentication on intermediate servers. For example, if you are connecting to Server C from Server A by first connecting to Server B (You → Server A → Server B → Server C), you only need to add the paired public key for your private key on intermediate servers (Server A, B and C).
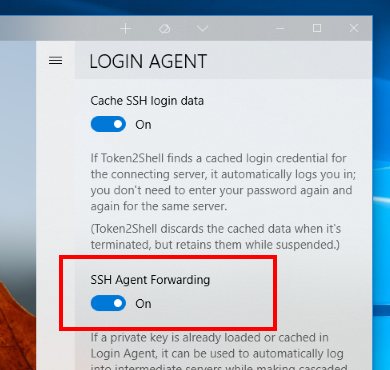
When you enable the SSH agent forwarding in Token2Shell, Token2Shell automatically detects your YubiKey and adds its public keys for SSH user authentication. So you don't have to manually run commands or select menus to use your YubiKey; just plug it in and you're ready!
You must enable SSH agent forwarding before starting a terminal session in WSL. The option is found in [ Login Agent ] » [ Settings ] » "SSH Agent Forwarding". Please note that the SSH agent forwarding in Token2Shell is a global feature that affects all sessions.
STEP 3 Create an Address Book entry for connecting to WSL
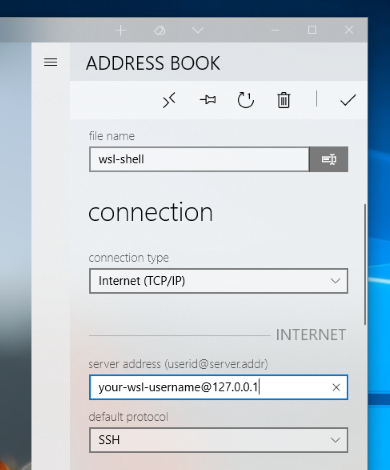
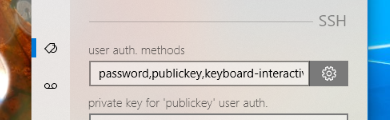
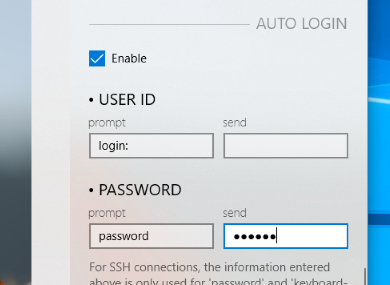
- Change the user authentication preference and make sure the 'password' is the first one.
- Adjust the SSH port number if your SSH server is not using the default SSH port (22).

- Enable Auto Login and enter your WSL password. The "prompt" texts are not used for SSH connections.
Creating a Windows shortcut for WSL and OpenSSH server
STEP 4 Test starting an SSH session from Command Prompt
Open Command Prompt and try connecting to WSL and see if you can login without any password. You should use the following format for starting a session:
start t2ab:///<your-address-book-entry-path>
"<your-address-book-entry-path>" is the path to the Address Book entry created in Step 3. Please note that the extra leading slash (/) character. The path must also be URL encoded if it contains space or any HTML reserved character.
When the path to the Address Book entry created in Step 3 is "wsl-shell", your command line should be:
start t2ab:///wsl-shell
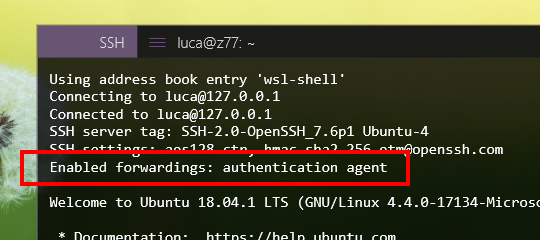
If SSH agent forwarding is correctly enabled in Token2Shell and your OpenSSH server on WSL is also properly configured to accept such request, you should be able to notice the "Enabled forwardings: authentication agent" status message on Token2Shell terminal screen.
STEP 5 Create a folder for WSL related scripts and assets
It can be any folder on any drive, but for the sake of simplicity, let's create it on C: drive and name it 'wsl': c:\wsl. If you've decided to use a different folder path, please make adjustments accordingly in the next steps.
We're using VBScript and Windows batch files to launch Token2Shell. You can directly launch Token2Shell without those files. However, we're using them in order to simplify managing the commands and to hide the Command Prompt window that pops up whenever Windows commands are executed.
STEP 6 Create a Windows batch file (*.bat) for starting a WSL terminal session
Instead of always starting the OpenSSH server when you log in, we're creating a batch file that starts the OpenSSH server just before Token2Shell is actually making a connection.
REM ### Start OpenSSH server
ubuntu1804.exe run "echo '<your-wsl-password>' | sudo -S service ssh start"

REM ### Start Token2Shell with an Address Book entry
start t2ab:///<your-address-book-entry-path>
Please change the "<your-wsl-password>" to your password for WSL. "<your-address-book-entry-path>" is the path to the Address Book entry created in Step 3. Please note that the extra leading slash (/) character. The path must also be URL encoded if it contains space or any HTML reserved character as mentioned in Step 3. However, after the URL encoding, its '%' character must be again escaped as '%%' since it's used in a Windows batch file. For example, all space characters must be changed to "%%20"; a space character is first changed to '%20' (URL encoding) and its '%' character is again changed to '%%' (Windows batch file escaping).
When your password for WSL is '123456' and the path to the Address Book entry created in Step 3 is "wsl-shell", your batch file should be:
REM ### Start OpenSSH server
ubuntu1804.exe run "echo '123456' | sudo -S service ssh start"

REM ### Start Token2Shell with an Address Book entry
start t2ab:///wsl-shell
STEP 7 Create a VBScript file for executing a batch file without any flashing Console window
If WScript.Arguments.Count <= 0 Then
    WScript.Quit
End If

bat = Left(WScript.ScriptFullName, InStrRev(WScript.ScriptFullName, "\")) & WScript.Arguments(0) & ".bat"
arg = ""

If WScript.Arguments.Count > 1 Then
    arg = WScript.Arguments(1)
End If

CreateObject("WScript.Shell").Run """" & bat & """ """ & arg & """", 0, False
Please note that the above VBScript automatically attaches the ".bat" file extension to its first argument and executes it as if it's a batch file in the same folder.
STEP 8 Create a shortcut for launching the batch file created in Step 6
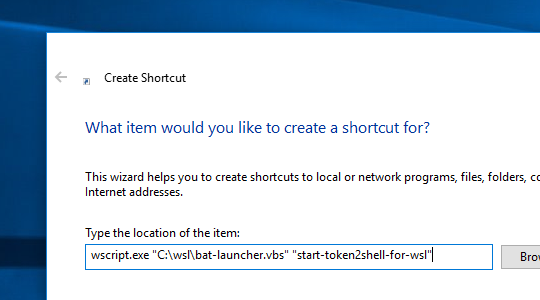
For the location of the item, you should enter the following:
wscript.exe "C:\wsl\bat-launcher.vbs" "start-token2shell-for-wsl"
Done! You can now double-click the shortcut and start using your YubiKey for SSH public key authentication. Just make sure your YubiKey is plugged in before connecting to your server from WSL.
Please note that you must also properly configure SSH on WSL and remote servers in order to have the SSH agent forwarding working correctly. For example, if you want to connect to Server A from WSL using the '<piv-card> Card Authentication (9E/PINLESS)' private key on your YubiKey, you must (1) add its public key to the "~/.ssh/authorized_keys" file on Server A, (2) enable the "publickey" user authentication on Server A, and (3) set the "publickey" user authentication as the first choice in WSL (this should be already the default setting for WSL).