Pages

Get your sidekick for easily managing and launching Linux GUI apps (WSL)

  • Windows 10 October 2018 Update (1809) and
    Ubuntu 18.04 were used while preparing this post

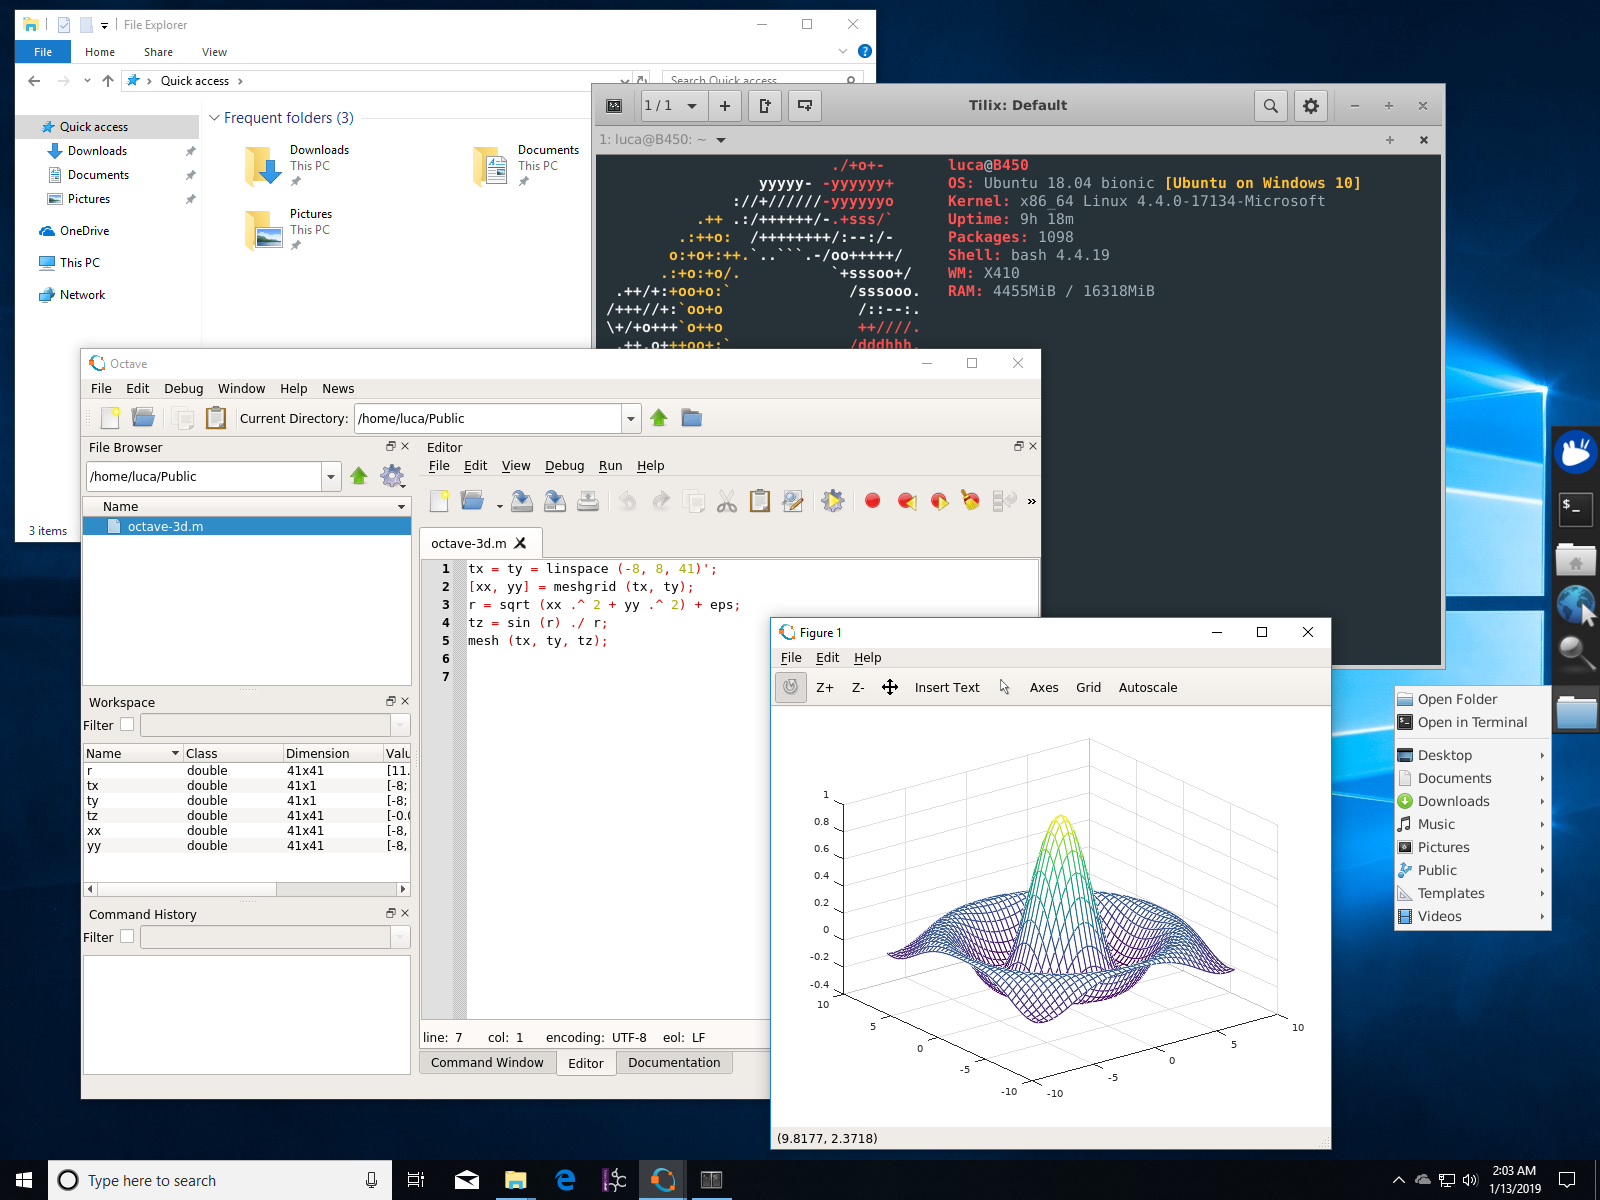
X410 supports Windowed Apps mode and it can be used to seamlessly intermix apps from Windows and Windows Subsystem for Linux (WSL). The following demonstrates a way to simplify managing Linux GUI apps and various UI settings with a minimal set of Xfce4 components.

PREPARATION

We'll be using Ubuntu 18.04 from Microsoft Store but you should also be able to achieve a similar result with any WSL distribution by following the steps described below.

After installing Ubuntu 18.04, execute the following command line first to have the installed Ubuntu binaries and data files up to date.

sudo apt update && sudo apt -y upgrade

STEP 1 Install Xfce4

There are numerous Linux GUI desktop environments, however, we're using Xfce4 for this article as it works well with WSL and its components can be individually launched.

Execute the following command to install Xfce4 desktop environment and its default terminal emulator.

sudo apt install xfce4 xfce4-terminal


When you install Xfce4 package, it also installs Xfce4 related components that are ineffective or causing unexpected behavior for WSL. You should simply remove the following packages:

sudo apt purge xfce4-power-manager xscreensaver gnome-screensaver light-locker


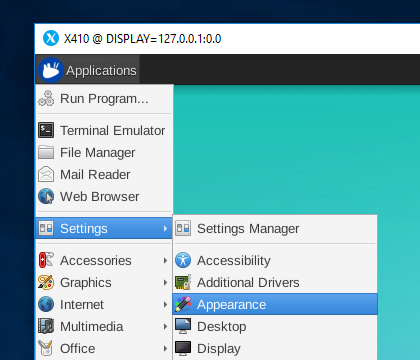
STEP 2 Launch X410 in Windowed Apps mode

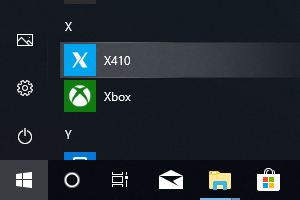
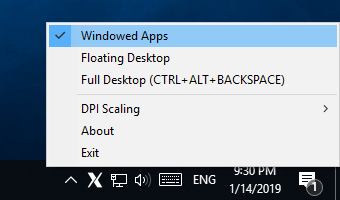
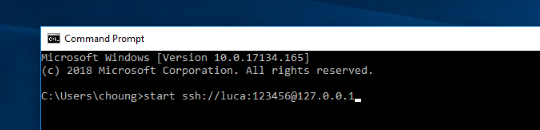
X410 can also be launched in Windowed Apps mode using a command-line switch from a Windows Command Prompt.

C:\> x410.exe /wm


TEST DRIVING

STEP 3 Start only core Xfce4 components

Xfce4 is comprised of many modules and when you launch "xfce4-session" or "startxfce4", it automatically loads them as needed. However, for our purpose, we only need two core components:

  • Settings Daemon (xfsettingsd)

    When you first launch this daemon, it loads all the settings you previously configured for Xfce4 (ex. UI themes, mouse pointer size, keyboard layout and etc.). It'll be running in background and when you make changes to the Xfce4 settings, they'll be automatically applied to the all running X-Window apps.

  • Panel (xfce4-panel)

    We'll be customizing this panel and use it for launching Linux GUI apps.

Execute the following command line to start the core Xfce4 components listed above.

xfsettingsd --sm-client-disable; xfce4-panel --sm-client-disable --disable-wm-check &


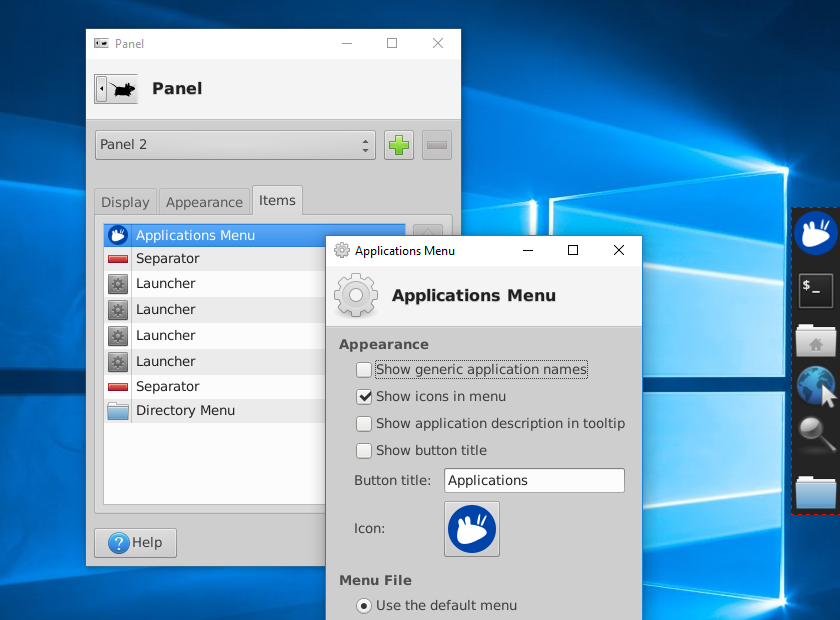
STEP 4 Adjust the layout and app shortcuts for Xfce4 panels

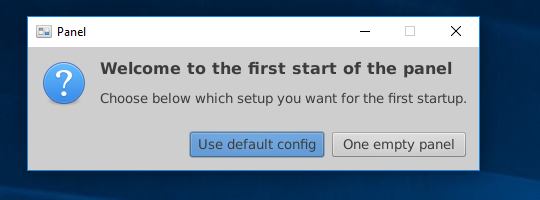
When you first launch xfce4-panel, it'll ask you if you want to create default panels. When you answer "Yes", two panels are created; one for listing currently running apps and the other for launching installed apps.

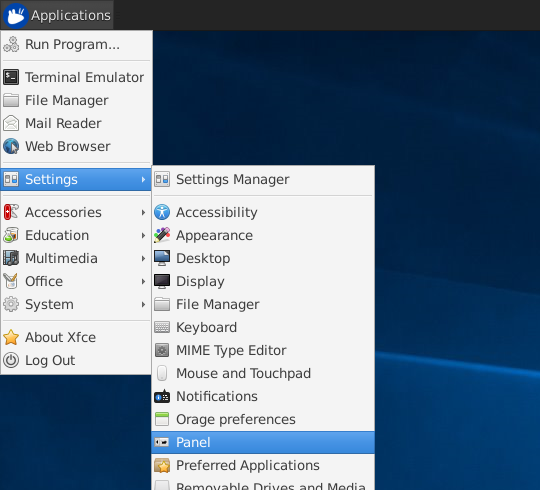
We deleted the first panel and moved the second one to the right side of the Windows desktop. We also made some changes to the shortcut buttons for the panel.

Please note that since we are not using xfce4-session, the "Log Out" menu won't work; you cannot close Xfce4 using a menu from the Xfce4 panel. When you want to terminate Xfce4, you can just shutdown X410 by using its "Exit" menu.

TIPS AND TRICKS

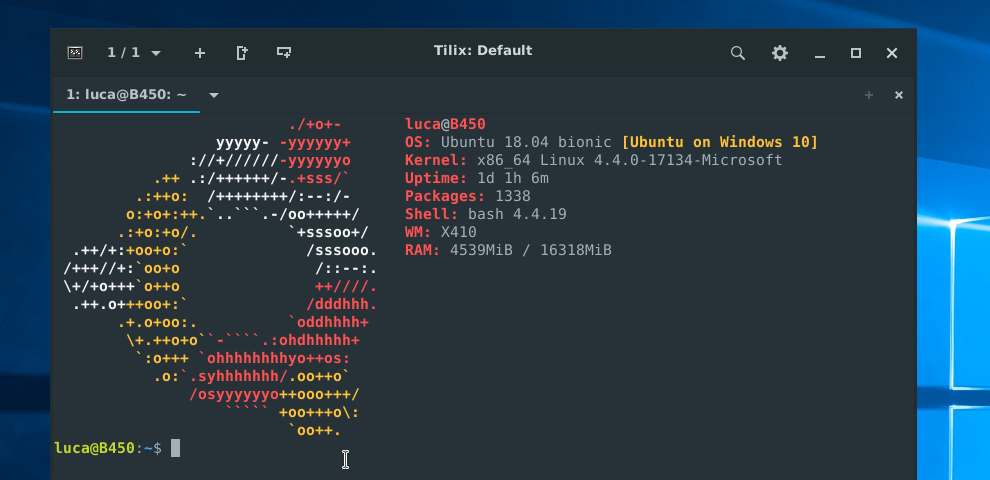
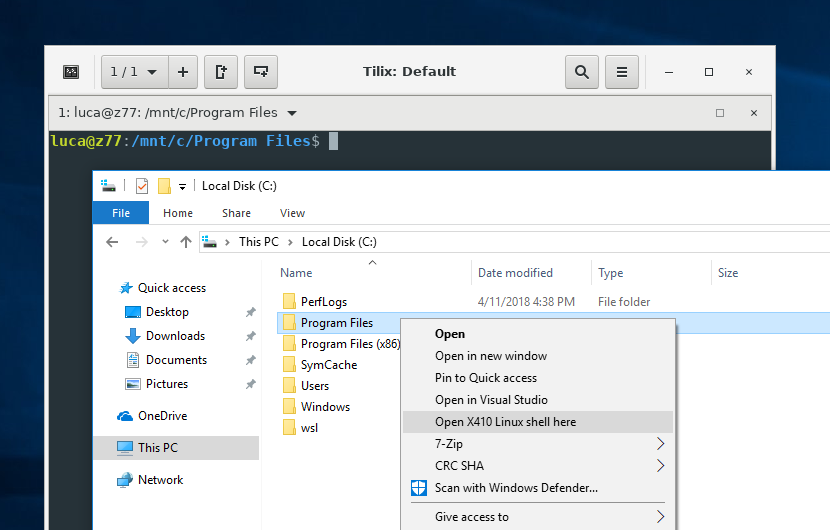
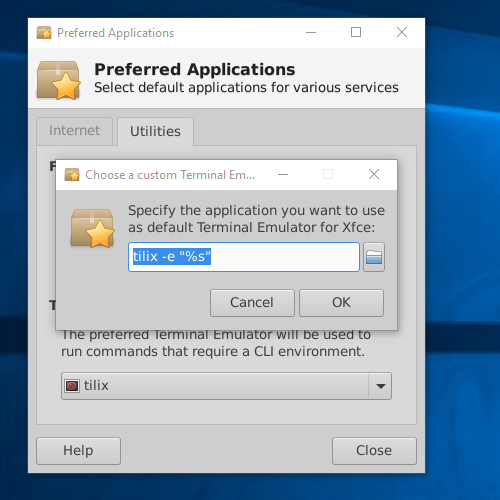
  • If you're using Tilix and want to set it as a default terminal emulator for Xfce, you need to assign it through [ Preferred Applications ] » "Utilities" » "Terminal Emulator" » "Other". When specifying its file path, don't forget to add the "-e" switch for executing a command that was passed as an argument (ex. htop):
    tilix -e "%s"


  • It seems you cannot launch applications that require root access rights (ex. Synaptic) via the xfce4-panel shortcuts. You can of course launch them in terminal command prompt using the "sudo" command.

CLEANING UP

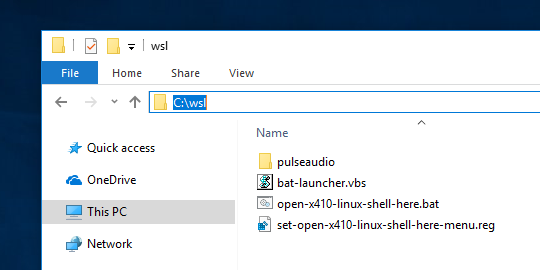
STEP 5 Create a batch file for launching X410 and Xfce4 components

The following is a Windows batch file that launches X410 and Xfce4 components mentioned in the previous steps.

C:\wsl\xfce4-sidekick.bat
@echo off
start /B x410.exe /wm

ubuntu1804.exe run "if [ -z $(pidof xfce4-panel) ]; then export DISPLAY=127.0.0.1:0.0; cd ~; xfsettingsd --sm-client-disable; xfce4-panel --sm-client-disable --disable-wm-check; taskkill.exe /IM x410.exe; fi;"


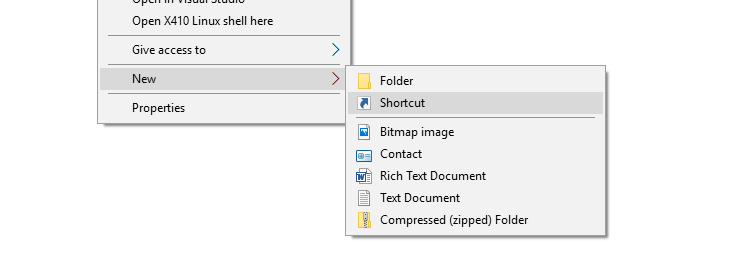
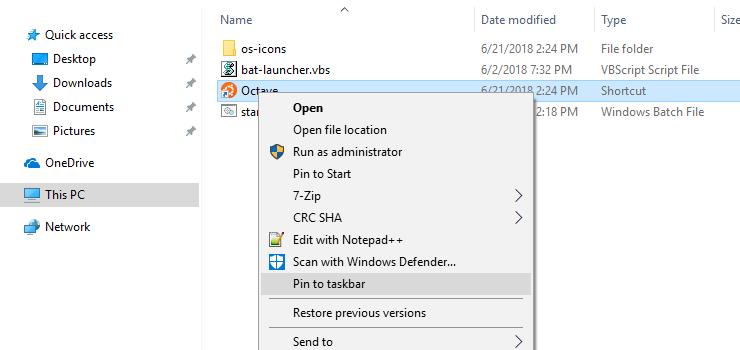
STEP 6 Create a Windows shortcut

You can directly launch the batch file created in Step 5 and have your Linux GUI environment ready. However, you can use the following VBScript and a Windows shortcut to silently launch the batch file and hide it from the Windows Taskbar. Please note that the VBScript file should be in the same folder as the batch file.

C:\wsl\bat-launcher.vbs
If WScript.Arguments.Count <= 0 Then
    WScript.Quit
End If	

bat = Left(WScript.ScriptFullName, InStrRev(WScript.ScriptFullName, "\")) & WScript.Arguments(0) & ".bat"
arg = ""

If WScript.Arguments.Count > 1 Then
    arg = WScript.Arguments(1)
End If

CreateObject("WScript.Shell").Run """" & bat & """ """ & arg & """", 0, False


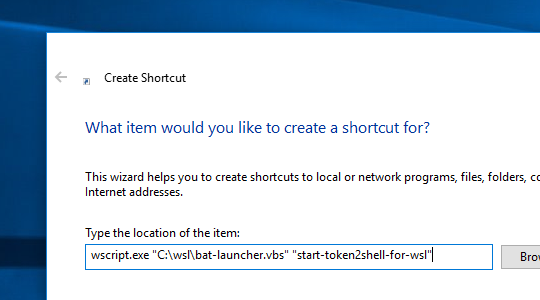
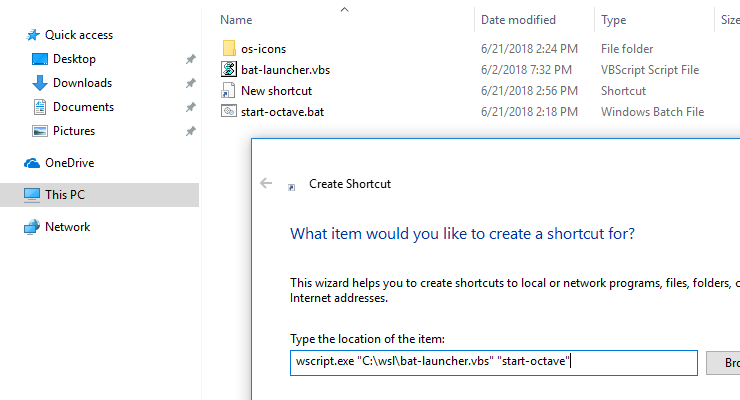
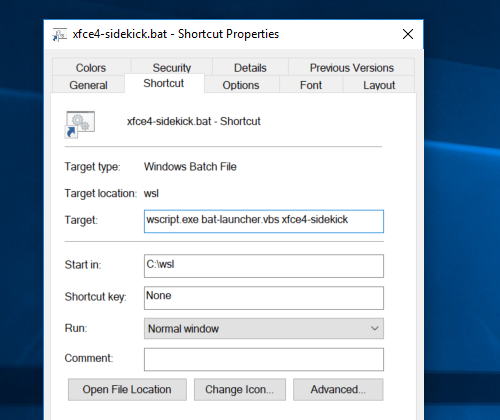
You can then create a shortcut for the batch file created in Step 5 and set its "Target" as the following (The "Start in" option for the shortcut should also be pointing to the folder where the actual files are located):

wscript.exe bat-launcher.vbs xfce4-sidekick


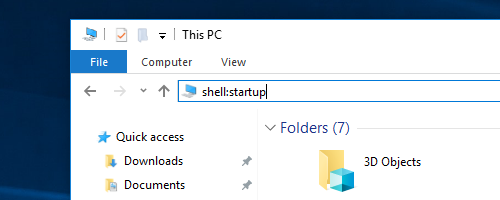
Do you want to automatically launch the script when you log in? Just copy the shortcut to the Windows "Startup" folder!


Your Linux sidekick is now ready for some action!


TIPS AND TRICKS

  • X410 has DPI scaling options and when you enable one of them, X410 automatically scales Linux GUI apps according to the DPI settings of the monitor that they are displayed on. However, if you want the most crisp and sharp output as possible, you should consider setting the scaling option in X410 to "None" and upscaling the output from the actual Linux GUI apps.

    As of this writing, only Qt5 based apps support fractional scaling. For example, if you want to only launch GNU Octave at 150% scaling, you can use the following command:

    QT_SCALE_FACTOR=1.5 octave


    If you want all Qt5 based apps to be scaled at 150%, you can add the following command to your login script (ex. ~/.bashrc):

    export QT_SCALE_FACTOR=1.5


    For GDK based apps, only integers are accepted for a scaling factor:

    GDK_SCALE=2 gedit


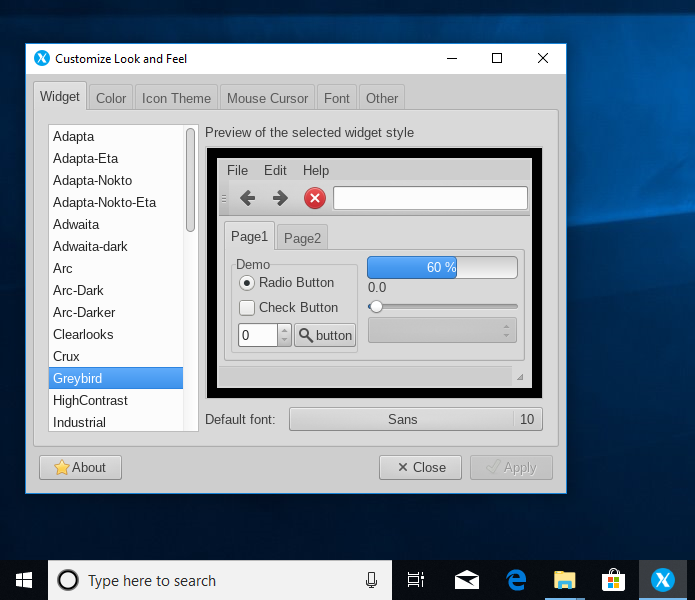
  • Xfce4 is a GDK based app hence its settings for UI themes only affects GDK apps. If you want to install and change UI themes for Qt5 apps, you should install "qt5ct" package and add the following to your login script (ex. ~/.bashrc):
    export QT_QPA_PLATFORMTHEME=qt5ct


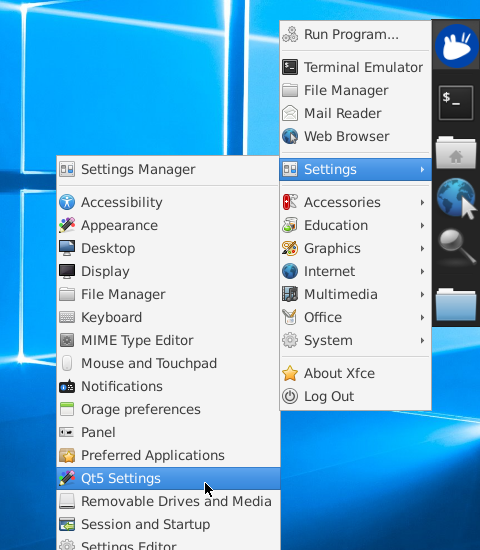
    When you want to change the UI theme for Qt5 based apps, you can execute the "qt5ct" from the command line or launch "Qt5 Settings" from the xfce4-panel shortcuts.

  • After changing your login scripts, you need to restart Xfce4; just exit X410 and then re-launch the startup shortcut created in Step 6.
  • Ubuntu repositories only seem to have the "Arc" GTK theme (arc-theme). If you're interested in using the "Adapta" GTK theme, you can use the following commands:
    sudo add-apt-repository -y ppa:tista/adapta
    sudo apt update
    sudo apt install adapta-gtk-theme


Using YubiKey from Windows Subsystem for Linux (WSL)

  • Requires Token2Shell version 15.1.0 or higher
  • Windows 10 April 2018 Update (1803) and
    Ubuntu 18.04 were used while preparing this post

Windows Subsystem for Linux (WSL) currently has very limited support for USB devices; it only supports accessing storage and serial pass-through devices. So you cannot directly use your YubiKey for SSH public key authentication in WSL; it doesn't matter which Linux distribution you use, they all have this limitation.

However, since Token2Shell natively supports PIV smart cards such as YubiKey and SSH agent forwarding, you can use your YubiKey from WSL via Token2Shell. The following describes the steps to accomplish this.

STEP 1 Install OpenSSH on WSL

We'll be using Ubuntu 18.04 and an OpenSSH server for setting up our workflow. If you're using a different Linux distribution, please consult its manual for installing and configuring an SSH server. You don't have to use an OpenSSH server; if you prefer a different sever, just make sure it's properly supported in WSL with the "publickey" user authentication and SSH agent forwarding.

For more information about installing an OpenSSH server on Ubuntu 18.04, please visit:
https://token2shell.com/howto/using-wsl-from-token2shell-or-any-terminal-emulator-via-openssh-server

STEP 2 Enable SSH Agent Forwarding in Token2Shell

SSH agent forwarding allows you to use locally stored private keys for user authentication on intermediate servers. For example, if you are connecting to Server C from Server A by first connecting to Server B (You → Server A → Server B → Server C), you only need to add the paired public key for your private key on intermediate servers (Server A, B and C).

When you enable the SSH agent forwarding in Token2Shell, Token2Shell automatically detects your YubiKey and adds its public keys for SSH user authentication. So you don't have to manually run commands or select menus to use your YubiKey; just plug it in and you're ready!

You must enable SSH agent forwarding before starting a terminal session in WSL. The option is found in [ Login Agent ] » [ Settings ] » "SSH Agent Forwarding". Please note that the SSH agent forwarding in Token2Shell is a global feature that affects all sessions.

STEP 3 Create an Address Book entry for connecting to WSL

  1. Change the user authentication preference and make sure the 'password' is the first one.
  2. Adjust the SSH port number if your SSH server is not using the default SSH port (22).
  3. Enable Auto Login and enter your WSL password. The "prompt" texts are not used for SSH connections.

Creating a Windows shortcut for WSL and OpenSSH server

STEP 4 Test starting an SSH session from Command Prompt

Open Command Prompt and try connecting to WSL and see if you can login without any password. You should use the following format for starting a session:

start t2ab:///<your-address-book-entry-path>

"<your-address-book-entry-path>" is the path to the Address Book entry created in Step 3. Please note that the extra leading slash (/) character. The path must also be URL encoded if it contains space or any HTML reserved character.

When the path to the Address Book entry created in Step 3 is "wsl-shell", your command line should be:

start t2ab:///wsl-shell

If SSH agent forwarding is correctly enabled in Token2Shell and your OpenSSH server on WSL is also properly configured to accept such request, you should be able to notice the "Enabled forwardings: authentication agent" status message on Token2Shell terminal screen.

STEP 5 Create a folder for WSL related scripts and assets

It can be any folder on any drive, but for the sake of simplicity, let's create it on C: drive and name it 'wsl': c:\wsl. If you've decided to use a different folder path, please make adjustments accordingly in the next steps.

We're using VBScript and Windows batch files to launch Token2Shell. You can directly launch Token2Shell without those files. However, we're using them in order to simplify managing the commands and to hide the Command Prompt window that pops up whenever Windows commands are executed.

STEP 6 Create a Windows batch file (*.bat) for starting a WSL terminal session

Instead of always starting the OpenSSH server when you log in, we're creating a batch file that starts the OpenSSH server just before Token2Shell is actually making a connection.

C:\wsl\start-token2shell-for-wsl.bat
REM ### Start OpenSSH server
ubuntu1804.exe run "echo '<your-wsl-password>' | sudo -S service ssh start"

REM ### Start Token2Shell with an Address Book entry
start t2ab:///<your-address-book-entry-path>

Please change the "<your-wsl-password>" to your password for WSL. "<your-address-book-entry-path>" is the path to the Address Book entry created in Step 3. Please note that the extra leading slash (/) character. The path must also be URL encoded if it contains space or any HTML reserved character as mentioned in Step 3. However, after the URL encoding, its '%' character must be again escaped as '%%' since it's used in a Windows batch file. For example, all space characters must be changed to "%%20"; a space character is first changed to '%20' (URL encoding) and its '%' character is again changed to '%%' (Windows batch file escaping).

When your password for WSL is '123456' and the path to the Address Book entry created in Step 3 is "wsl-shell", your batch file should be:

REM ### Start OpenSSH server
ubuntu1804.exe run "echo '123456' | sudo -S service ssh start"

REM ### Start Token2Shell with an Address Book entry
start t2ab:///wsl-shell

STEP 7 Create a VBScript file for executing a batch file without any flashing Console window

C:\wsl\bat-launcher.vbs
If WScript.Arguments.Count <= 0 Then
    WScript.Quit
End If	

bat = Left(WScript.ScriptFullName, InStrRev(WScript.ScriptFullName, "\")) & WScript.Arguments(0) & ".bat"
arg = ""

If WScript.Arguments.Count > 1 Then
    arg = WScript.Arguments(1)
End If

CreateObject("WScript.Shell").Run """" & bat & """ """ & arg & """", 0, False

Please note that the above VBScript automatically attaches the ".bat" file extension to its first argument and executes it as if it's a batch file in the same folder.

STEP 8 Create a shortcut for launching the batch file created in Step 6

For the location of the item, you should enter the following:

wscript.exe "C:\wsl\bat-launcher.vbs" "start-token2shell-for-wsl"

Done! You can now double-click the shortcut and start using your YubiKey for SSH public key authentication. Just make sure your YubiKey is plugged in before connecting to your server from WSL.

Please note that you must also properly configure SSH on WSL and remote servers in order to have the SSH agent forwarding working correctly. For example, if you want to connect to Server A from WSL using the '<piv-card> Card Authentication (9E/PINLESS)' private key on your YubiKey, you must (1) add its public key to the "~/.ssh/authorized_keys" file on Server A, (2) enable the "publickey" user authentication on Server A, and (3) set the "publickey" user authentication as the first choice in WSL (this should be already the default setting for WSL).

Adding "Open Token2Shell here" to File Explorer for WSL (Address Book)

  • Requires Token2Shell version 15.1.0 or higher
  • Windows 10 April 2018 Update (1803) and
    Ubuntu 18.04 were used while preparing this post

STEP 1 Install OpenSSH server

We'll be using Ubuntu 18.04 and OpenSSH server for this example. If you're using a different Linux distribution, please consult its manual for installing an SSH server. You don't have to use an OpenSSH server; if you prefer a different sever, just make sure it's properly supported in WSL.

For more information about installing an OpenSSH server on Ubuntu 18.04, please visit:
http://token2shell.com/howto/using-wsl-from-token2shell-or-any-terminal-emulator-via-openssh-server

We'll create an Address Book entry in Token2Shell for automatically logging into WSL. In order to create such an entry, your SSH server at least supports 'password' or 'publickey' user authentication.

STEP 2 Create an Address Book entry

▮ 'password' User Authentication Method

  1. Change the user authentication preference and make sure the 'password' is the first one.
  2. Adjust the SSH port number if your SSH server is not using the default SSH port (22).
  3. Enable Auto Login and enter your WSL password. The "prompt" texts are not used for SSH connections.

▮ 'publickey' User Authentication Method

Please note that you don't have to select the "Enable X11 Forwarding" option in order to use X Window apps on WSL. Even though you're connecting to WSL via SSH, you're still in the same local computer as WSL; you can directly connect to the X server. In order to use X Window apps, just make sure your DISPLAY environment variable is correctly pointing to the X server. For example, if you're using X410, your DISPLAY environment variable should be set to 127.0.0.1:0.0.

export DISPLAY=127.0.0.1:0.0


Click "Connect" and make sure you can connect to WSL without entering any password.

STEP 3 Test starting an SSH session from Command Prompt

Open Command Prompt and try connecting to WSL and see if you can login without any password. You should use the following format for starting a session:

start t2ab:///<your-address-book-entry-path>


"<your-address-book-entry-path>" is the path to the Address Book entry created in Step 2. Please note that the extra leading slash (/) character. The path must also be URL encoded if it contains space or any HTML reserved character.

When the path to the Address Book entry created in Step 2 is "wsl-shell", your command line should be:

start t2ab:///wsl-shell


STEP 4 Create a folder for WSL related scripts and assets

It can be any folder on any drive, but for the sake of simplicity, let's create it on C: drive and name it 'wsl': c:\wsl. If you've decided to use a different folder path, please make adjustments accordingly to the scripts and registry settings described in the next steps.

We're using a VBScript and a Windows batch file (open-token2shell-here.bat) to launch Token2Shell. You can directly launch Token2Shell without those files. However, we're using them in order to simplify managing the commands (instead of editing the Windows registry, you can just edit the files) and to hide the Command Prompt window that pops up whenever Windows commands are executed.

STEP 5 Create a VBScript file for executing a batch file without any flashing Console window

We can directly execute the batch file that will be created in Step 5 for actually launching Token2Shell. However, Windows always shows a Command Prompt window when executing a batch file; we couldn't find a way to completely hide it. By using this VBScript, we can silently run the batch file and open Token2Shell.

C:\wsl\bat-launcher.vbs
If WScript.Arguments.Count <= 0 Then
    WScript.Quit
End If	

bat = Left(WScript.ScriptFullName, InStrRev(WScript.ScriptFullName, "\")) & WScript.Arguments(0) & ".bat"
arg = ""

If WScript.Arguments.Count > 1 Then
    arg = WScript.Arguments(1)
End If

CreateObject("WScript.Shell").Run """" & bat & """ """ & arg & """", 0, False


Please note that the above VBScript automatically attaches the ".bat" file extension to its first argument and executes it as if it's a batch file in the same folder.

STEP 6 Create a Windows batch file (*.bat) for launching Token2Shell

C:\wsl\open-token2shell-here.bat
ubuntu1804.exe run "echo '<your-wsl-password>' | sudo -S service ssh start"

REM ### Need to adjust the path (%1) so it can be correctly passed as a part of the full URL
setlocal EnableDelayedExpansion
REM ### Remove the surrounding quotes ("") from %1
SET _gotopath=%~1
REM ### Replace space characters with %20's
SET _gotopath=!_gotopath: =%%20!
REM ### Replace '#' characters with %23's
SET _gotopath=!_gotopath:#=%%23!

cmd.exe /C start t2ab:///<your-address-book-entry-path>?exec=cd%%20%%22$(wslpath%%20'%_gotopath%')%%22;clear;$SHELL%%20--login


Please change the "<your-wsl-password>" to your password for WSL. "<your-address-book-entry-path>" is the path to the Address Book entry created in Step 2. Please note that the extra leading slash (/) character. The path must also be URL encoded if it contains space or any HTML reserved character as mentioned in Step 3. However, after the URL encoding, its '%' character must be again escaped as '%%' since it's used in a Windows batch file. For example, all space characters must be changed to "%%20"; a space character is first changed to '%20' (URL encoding) and its '%' character is again changed to '%%' (Windows batch file escaping).

When your password for WSL is '123456' and the path to the Address Book entry created in Step 2 is "wsl-shell", your batch file should be:

ubuntu1804.exe run "echo '123456' | sudo -S service ssh start"

REM ### Need to adjust the path (%1) so it can be correctly passed as a part of the full URL
setlocal EnableDelayedExpansion
REM ### Remove the surrounding quotes ("") from %1
SET _gotopath=%~1
REM ### Replace space characters with %20's
SET _gotopath=!_gotopath: =%%20!
REM ### Replace '#' characters with %23's
SET _gotopath=!_gotopath:#=%%23!

cmd.exe /C start t2ab:///wsl-shell?exec=cd%%20%%22$(wslpath%%20'%_gotopath%')%%22;clear;$SHELL%%20--login


WSL currently doesn't support automatically launching server programs (or daemons). Hence our OpenSSH server must be started manually but the current version of WSL now does allow having servers running in background even when all Linux terminal windows are closed. All in all, instead of immediately starting the OpenSSH server when you login to Windows, our batch file launches the server just before it's actually needed for Token2Shell.

In order to start an OpenSSH server, you need to use the 'sudo' command in Ubuntu. In our batch file, we're using the 'echo' command with 'sudo -S' in order to feed your password to the 'sudo' command. If you're using the same password as Windows login, we highly recommend changing it. WSL manages its own separate accounts from Windows, so you should set a different password (perhaps a simpler one) only for WSL.

There are other ways to start the server. But as far as we know they all focus on permanently removing the password for the 'sudo' command and require editing a system configuration file on Linux (ex. editing the '/etc/sudoers' file with 'visudo' command). Our approach of using the 'sudo -S' is much simpler and should provide more flexibility since it can also be used for other servers without changing any system file on Linux.

STEP 7 Create a registry file for setting up the right-click menu

C:\wsl\set-open-token2shell-here-menu.reg
Windows Registry Editor Version 5.00

[HKEY_CURRENT_USER\Software\Classes\Directory]

[HKEY_CURRENT_USER\Software\Classes\Directory\Background]

[HKEY_CURRENT_USER\Software\Classes\Directory\Background\shell]

[HKEY_CURRENT_USER\Software\Classes\Directory\Background\shell\Token2Shell]
@="Open Token2Shell here"

[HKEY_CURRENT_USER\Software\Classes\Directory\Background\shell\Token2Shell\command]
@="wscript.exe \"C:\\wsl\\bat-launcher.vbs\" \"open-token2shell-here\" \"%V\""

[HKEY_CURRENT_USER\Software\Classes\Directory\shell]

[HKEY_CURRENT_USER\Software\Classes\Directory\shell\Token2Shell]
@="Open Token2Shell here"

[HKEY_CURRENT_USER\Software\Classes\Directory\shell\Token2Shell\command]
@="wscript.exe \"C:\\wsl\\bat-launcher.vbs\" \"open-token2shell-here\" \"%V\""


If you're not using "c:\wsl" for the scripts created in Step 5 and 6, please make sure to adjust the paths for 'open-token2shell-here.vbs' and 'open-token2shell-here.bat' according to your setup.

Once you have the 'set-open-token2shell-here-menu.reg' file, you can import it to Windows registry by double-clicking it or using the 'Import' menu from the Windows 'regedit' program.

DONE!

Adding "Open Token2Shell here" to File Explorer for WSL (ssh:// URL)

  • Requires Token2Shell version 15.1.0 or higher
  • Windows 10 April 2018 Update (1803) and
    Ubuntu 18.04 were used while preparing this post

STEP 1 Install OpenSSH server

We'll be using Ubuntu 18.04 and OpenSSH server for this example. If you're using a different Linux distribution, please consult its manual for installing an SSH server. You don't have to use an OpenSSH server; if you prefer a different sever, just make sure it's properly supported in WSL.

For more information about installing an OpenSSH server on Ubuntu 18.04, please visit:
http://token2shell.com/howto/using-wsl-from-token2shell-or-any-terminal-emulator-via-openssh-server

While configuring your SSH server, please make sure the "password" user authentication is enabled; we'll be using the 'password' user authentication for automatically logging into WSL.

STEP 2 Set the "password" as your first preference for the default SSH user auth. methods

Please note that you don't have to select the "Enable X11 Forwarding" option in order to use X Window apps on WSL. Even though you're connecting to WSL via SSH, you're still in the same local computer as WSL; you can directly connect to the X server. In order to use X Window apps, just make sure your DISPLAY environment variable is correctly pointing to the X server. For example, if you're using X410, your DISPLAY environment variable should be set to 127.0.0.1:0.0.

export DISPLAY=127.0.0.1:0.0


Click the Back button and return to the desktop.

STEP 3 Test starting an SSH session from Command Prompt

Open Command Prompt and try connecting to WSL and see if you can login without any password. You should use the following format for starting a session:

start ssh://<your-wsl-username>:<your-wsl-password>@127.0.0.1


Please change the "<your-wsl-username>" and "<your-wsl-password>" to your user name and password for WSL. For example, if your user name is 'luca' and the password is '123456', the command line should be:

start ssh://luca:123456@127.0.0.1


If your SSH server is not using the default SSH port number (22), you need to append the number at the end with a colon (:). For example, if your server is at 2222, your command line should be:

start ssh://luca:123456@127.0.0.1:2222


STEP 4 Create a folder for WSL related scripts and assets

It can be any folder on any drive, but for the sake of simplicity, let's create it on C: drive and name it 'wsl': c:\wsl. If you've decided to use a different folder path, please make adjustments accordingly to the scripts and registry settings described in the next steps.

We're using a VBScript and a Windows batch file (open-token2shell-here.bat) to launch Token2Shell. You can directly launch Token2Shell without those files. However, we're using them in order to simplify managing the commands (instead of editing the Windows registry, you can just edit the files) and to hide the Command Prompt window that pops up whenever Windows commands are executed.

STEP 5 Create a VBScript file for executing a batch file without any flashing Console window

We can directly execute the batch file that will be created in Step 5 for actually launching Token2Shell. However, Windows always shows a Command Prompt window when executing a batch file; we couldn't find a way to completely hide it. By using this VBScript, we can silently run the batch file and open Token2Shell.

C:\wsl\bat-launcher.vbs
If WScript.Arguments.Count <= 0 Then
    WScript.Quit
End If	

bat = Left(WScript.ScriptFullName, InStrRev(WScript.ScriptFullName, "\")) & WScript.Arguments(0) & ".bat"
arg = ""

If WScript.Arguments.Count > 1 Then
    arg = WScript.Arguments(1)
End If

CreateObject("WScript.Shell").Run """" & bat & """ """ & arg & """", 0, False


Please note that the above VBScript automatically attaches the ".bat" file extension to its first argument and executes it as if it's a batch file in the same folder.

STEP 6 Create a Windows batch file (*.bat) for launching Token2Shell

C:\wsl\open-token2shell-here.bat
ubuntu1804.exe run "echo '<your-wsl-password>' | sudo -S service ssh start"

REM ### Need to adjust the path (%1) so it can be correctly passed as a part of the full URL
setlocal EnableDelayedExpansion
REM ### Remove the surrounding quotes ("") from %1
SET _gotopath=%~1
REM ### Replace space characters with %20's
SET _gotopath=!_gotopath: =%%20!
REM ### Replace '#' characters with %23's
SET _gotopath=!_gotopath:#=%%23!

cmd.exe /C start ssh://<your-wsl-username>:<your-wsl-password>@127.0.0.1/?exec=cd%%20%%22$(wslpath%%20'%_gotopath%')%%22;clear;$SHELL%%20--login


Please change the "<your-wsl-username>" and "<your-wsl-password>" to your user name and password for WSL. If your SSH server doesn't use the default SSH port number (22), you need to adjust the command line as mentioned in Step 3. For example, if your SSH server is at port 2222 and your user name and password for WSL are 'luca' and '123456' respectively, your batch file should be:

ubuntu1804.exe run "echo '123456' | sudo -S service ssh start"

REM ### Need to adjust the path (%1) so it can be correctly passed as a part of the full URL
setlocal EnableDelayedExpansion
REM ### Remove the surrounding quotes ("") from %1
SET _gotopath=%~1
REM ### Replace space characters with %20's
SET _gotopath=!_gotopath: =%%20!
REM ### Replace '#' characters with %23's
SET _gotopath=!_gotopath:#=%%23!

cmd.exe /C start ssh://luca:123456@127.0.0.1:2222/?exec=cd%%20%%22$(wslpath%%20'%_gotopath%')%%22;clear;$SHELL%%20--login


WSL currently doesn't support automatically launching server programs (or daemons). Hence our OpenSSH server must be started manually but the current version of WSL now does allow having servers running in background even when all Linux terminal windows are closed. All in all, instead of immediately starting the OpenSSH server when you login to Windows, our batch file launches the server just before it's actually needed for Token2Shell.

In order to start an OpenSSH server, you need to use the 'sudo' command in Ubuntu. In our batch file, we're using the 'echo' command with 'sudo -S' in order to feed your password to the 'sudo' command. If you're using the same password as Windows login, we highly recommend changing it. WSL manages its own separate accounts from Windows, so you should set a different password (perhaps a simpler one) only for WSL.

There are other ways to start the server. But as far as we know they all focus on permanently removing the password for the 'sudo' command and require editing a system configuration file on Linux (ex. editing the '/etc/sudoers' file with 'visudo' command). Our approach of using the 'sudo -S' is much simpler and should provide more flexibility since it can also be used for other servers without changing any system file on Linux.

STEP 7 Create a registry file for setting up the right-click menu

C:\wsl\set-open-token2shell-here-menu.reg
Windows Registry Editor Version 5.00

[HKEY_CURRENT_USER\Software\Classes\Directory]

[HKEY_CURRENT_USER\Software\Classes\Directory\Background]

[HKEY_CURRENT_USER\Software\Classes\Directory\Background\shell]

[HKEY_CURRENT_USER\Software\Classes\Directory\Background\shell\Token2Shell]
@="Open Token2Shell here"

[HKEY_CURRENT_USER\Software\Classes\Directory\Background\shell\Token2Shell\command]
@="wscript.exe \"C:\\wsl\\bat-launcher.vbs\" \"open-token2shell-here\" \"%V\""

[HKEY_CURRENT_USER\Software\Classes\Directory\shell]

[HKEY_CURRENT_USER\Software\Classes\Directory\shell\Token2Shell]
@="Open Token2Shell here"

[HKEY_CURRENT_USER\Software\Classes\Directory\shell\Token2Shell\command]
@="wscript.exe \"C:\\wsl\\bat-launcher.vbs\" \"open-token2shell-here\" \"%V\""


If you're not using "c:\wsl" for the scripts created in Step 5 and 6, please make sure to adjust the paths for 'open-token2shell-here.vbs' and 'open-token2shell-here.bat' according to your setup.

Once you have the 'set-open-token2shell-here-menu.reg' file, you can import it to Windows registry by double-clicking it or using the 'Import' menu from the Windows 'regedit' program.

DONE!

Pin a Linux GUI App to Start or Taskbar

Let's try creating a shortcut for launching GNU Octave from the Windows taskbar. Ubuntu 18.04 is used for this example and all script files are assumed to be stored in 'C:\wsl' folder.

STEP 1 Install GNU Octave

sudo apt install octave

STEP 2 Create a batch file for launching the newly installed GNU Octave

C:\wsl\start-octave.bat
@echo off

REM *** Start X410 in Windowed Apps mode. If X410 is already running in Desktop mode,
REM *** it'll be silently terminated and restarted in Windowed Apps mode.

x410.exe /wm

REM *** Start GNU Octave

ubuntu1804.exe run "export DISPLAY=127.0.0.1:0.0; octave&"

STEP 3 Create a VBScript file for executing a batch file without any flashing Console window

Windows always shows a Command Prompt window when executing a batch file; we couldn't find a way to completely hide it. By using this VBScript, we can silently run the batch file.

C:\wsl\bat-launcher.vbs
If WScript.Arguments.Count <= 0 Then
    WScript.Quit
End If	

bat = Left(WScript.ScriptFullName, InStrRev(WScript.ScriptFullName, "\")) & WScript.Arguments(0) & ".bat"
arg = ""

If WScript.Arguments.Count > 1 Then
    arg = WScript.Arguments(1)
End If

CreateObject("WScript.Shell").Run """" & bat & """ """ & arg & """", 0, False

STEP 4 Create a shortcut for launching the batch file from Step 2 using the VBScript from Step 3

Set the target of the shortcut to:

wscript.exe "C:\wsl\bat-launcher.vbs" "start-octave"

STEP 5 You can now select 'Pin to taskbar' or 'Pin to Start' from the right-click popup menu

Setting the Theme for Linux GUI Apps (Windowed Apps Mode)

If you're using a desktop environment (DE) such as Xfce4 via the Desktop mode in X410, you can change its UI theme (i.e., colors, layout and etc.) by using the settings menu already built into the DE. For example, you can change the theme in Xfce4 via [ Applications ] » [ Settings ] » [ Appearance ].

If you're using your Linux GUI apps via X410 in Windowed Apps mode and want to apply a theme, you need to manually update the system wide theme settings file or set an environment variable before launching your apps.

Setting an environment variable

  • GTK+ 3 (Installed themes are in /usr/share/themes)

    export GDK_THEME=theme_name
    
  • Qt 5

    export QT_STYLE_OVERRIDE=theme_name
    

Theme settings file for GTK+ 3

  • User specific:

    ~/.config/gtk-3.0/settings.ini
  • System wide:

    /etc/gtk-3.0/settings.ini

If you're using Ubuntu, you can also set the theme for GTK+ 3 by using the 'lxappearance' app. lxappearance is a desktop independent GTK+ 2 and GTK+ 3 style configuration tool from the LXDE project (http://wiki.lxde.org/en/LXAppearance).

sudo apt install lxappearance

Opening a genuine Linux terminal emulator directly from File Explorer (WSL)

  • Windows 10 April 2018 Update (1803) and
    Ubuntu 18.04 were used while preparing this post

If you want to open a genuine Linux terminal emulator from the right-click popup menu for the selected folder in Windows File Explorer, read on!

STEP 1 Get your favorite terminal emulator ready

WSL doesn't officially support running Linux GUI apps. Hence when you first install Ubuntu/WSL from the Store, it doesn't include any X Window related libraries or utility programs. So please check the following post for minimal X Window setup and make sure your Linux GUI terminal is properly running before linking it to the Windows File Explorer.

For this example, we'll be linking a terminal emulator named Tilix. But you shouldn't have any problem using any other terminal emulator.

sudo apt install tilix


STEP 2 Create a folder for WSL related scripts and assets

It can be any folder on any drive, but for the sake of simplicity, let's create it on C: drive and name it 'wsl': c:\wsl. If you've decided to use a different folder path, please make adjustments accordingly to the scripts and registry settings described in the next steps.

STEP 3 Create a VBScript file for executing a batch file without any flashing Console window

We can directly execute the batch file that will be created in Step 4 for actually setting up and launching your Linux terminal emulator. However, Windows always shows a Command Prompt window when executing a batch file; we couldn't find a way to completely hide it. By using this VBScript, we can silently run the batch file and only show your Linux terminal emulator.

C:\wsl\bat-launcher.vbs
If WScript.Arguments.Count <= 0 Then
    WScript.Quit
End If	

bat = Left(WScript.ScriptFullName, InStrRev(WScript.ScriptFullName, "\")) & WScript.Arguments(0) & ".bat"
arg = ""

If WScript.Arguments.Count > 1 Then
    arg = WScript.Arguments(1)
End If

CreateObject("WScript.Shell").Run """" & bat & """ """ & arg & """", 0, False


Please note that the above VBScript automatically attaches the ".bat" file extension to its first argument and executes it as if it's a batch file in the same folder.

STEP 4 Create a Windows batch file (*.bat) for launching your favorite Linux terminal emulator

C:\wsl\open-x410-linux-shell-here.bat
@echo off

REM ### Start X410 in Windowed Apps Mode. If X410 is already running in Desktop Mode, 
REM ### it'll be terminated first without any warning message box.

start /B x410.exe /wm

REM ### Setup a D-Bus instance that will be shared by all X-Window apps

ubuntu1804.exe run "sh -ic 'if [ -z \"$(pidof dbus-launch)\" ]; then export DISPLAY=127.0.0.1:0.0; dbus-launch --exit-with-x11; fi;'"

REM ### Go to the selected folder path and open your terminal app

ubuntu1804.exe run "cd \"$(wslpath '%1')\"; export DISPLAY=127.0.0.1:0.0; exec tilix"


Many X-Window apps use the D-Bus for inter-process communication (IPC). If you don't setup a D-Bus instance that can be shared by all subsequently launched X-Window apps, a temporary D-Bus is created and automatically terminated when you close your terminal even if you use "nohup" or "disown" command. This can cause other X-Window apps that were launched from your terminal to exit since the D-Bus they were using is terminated.

For your information, if you want to launch an X-Window app and have it keep running even if you close your terminal, try using "nohup" or "disown" command. For example, the following launches 'gedit' and keep it opened:

gedit & disown


Or

nohup gedit &


'nohup' command creates a 'nohup.out' file. If you don't want that file, you can do the following:

nohup gedit >/dev/null 2>&1 &


STEP 5 Create a registry file for setting up the right-click menu

C:\wsl\set-open-x410-linux-shell-here-menu.reg
Windows Registry Editor Version 5.00

[HKEY_CURRENT_USER\Software\Classes\Directory]

[HKEY_CURRENT_USER\Software\Classes\Directory\Background]

[HKEY_CURRENT_USER\Software\Classes\Directory\Background\shell]

[HKEY_CURRENT_USER\Software\Classes\Directory\Background\shell\X410LinuxShell]
@="Open X410 Linux shell here"

[HKEY_CURRENT_USER\Software\Classes\Directory\Background\shell\X410LinuxShell\command]
@="wscript.exe \"C:\\wsl\\bat-launcher.vbs\" \"open-x410-linux-shell-here\" \"%V\""

[HKEY_CURRENT_USER\Software\Classes\Directory\shell]

[HKEY_CURRENT_USER\Software\Classes\Directory\shell\X410LinuxShell]
@="Open X410 Linux shell here"

[HKEY_CURRENT_USER\Software\Classes\Directory\shell\X410LinuxShell\command]
@="wscript.exe \"C:\\wsl\\bat-launcher.vbs\" \"open-x410-linux-shell-here\" \"%V\""


If you're not using "c:\wsl" for the scripts created in Step 3 and 4, please make sure to adjust the paths for 'open-x410-linux-shell-here.vbs' and 'open-x410-linux-shell-here.bat' according to your setup.

Once you have the 'set-open-x410-linux-shell-here-menu.reg' file, you can import it to Windows registry by double-clicking it or using the 'Import' menu from the Windows 'regedit' program.

DONE!

Applying a Theme to Your Terminal Emulator

If your Linux terminal emulator is using GTK+, you can apply a theme by setting the GTK_THEME environment variable before launching it from the batch file. For example, if you want to apply the 'Arc' theme:

STEP 1 Install the theme

sudo apt install arc-theme


You can check the currently available themes in '/usr/share/themes' folder.

STEP 2 Set GTK_THEME

ubuntu1804.exe run "cd \"$(wslpath '%1')\"; export DISPLAY=127.0.0.1:0.0; export GTK_THEME=Arc; exec tilix"


If a theme has a "dark" variant, it can be selected by the ":dark" suffix.

ubuntu1804.exe run "cd \"$(wslpath '%1')\"; export DISPLAY=127.0.0.1:0.0; export GTK_THEME=Arc:dark; exec tilix"


Installing Adapta Theme

If you're using Ubuntu 18.04 (Bionic) / WSL and interested in applying the Adapta theme to your Linux terminal, you need to install it from its PPA repository as it's not available on the official Ubuntu repositories:

sudo add-apt-repository -y ppa:tista/adapta
sudo apt update
sudo apt install adapta-gtk-theme


You should also install Roboto and Noto fonts:

sudo apt install fonts-roboto
sudo apt install fonts-noto


After installing the theme, change the GTK_THEME environment variable to 'Adapta' (Light) or 'Adapta-Nokto' (Dark).

ubuntu1804.exe run "cd \"$(wslpath '%1')\"; export DISPLAY=127.0.0.1:0.0; export GTK_THEME=Adapta-Nokto; exec tilix"